...
| Info |
|---|
Need help setting this up? Contact the Help Desk at helpdesk@ccad.edu! |
| Table of Contents |
|---|
...
Video tutorials
Part 1: Create appointment slots on Google Calendar
...
Part 2: (OPTIONAL) Embed on Moodle course page
...
Step-by-Step Instructions
Part 1: Create appointment slots on Google Calendar
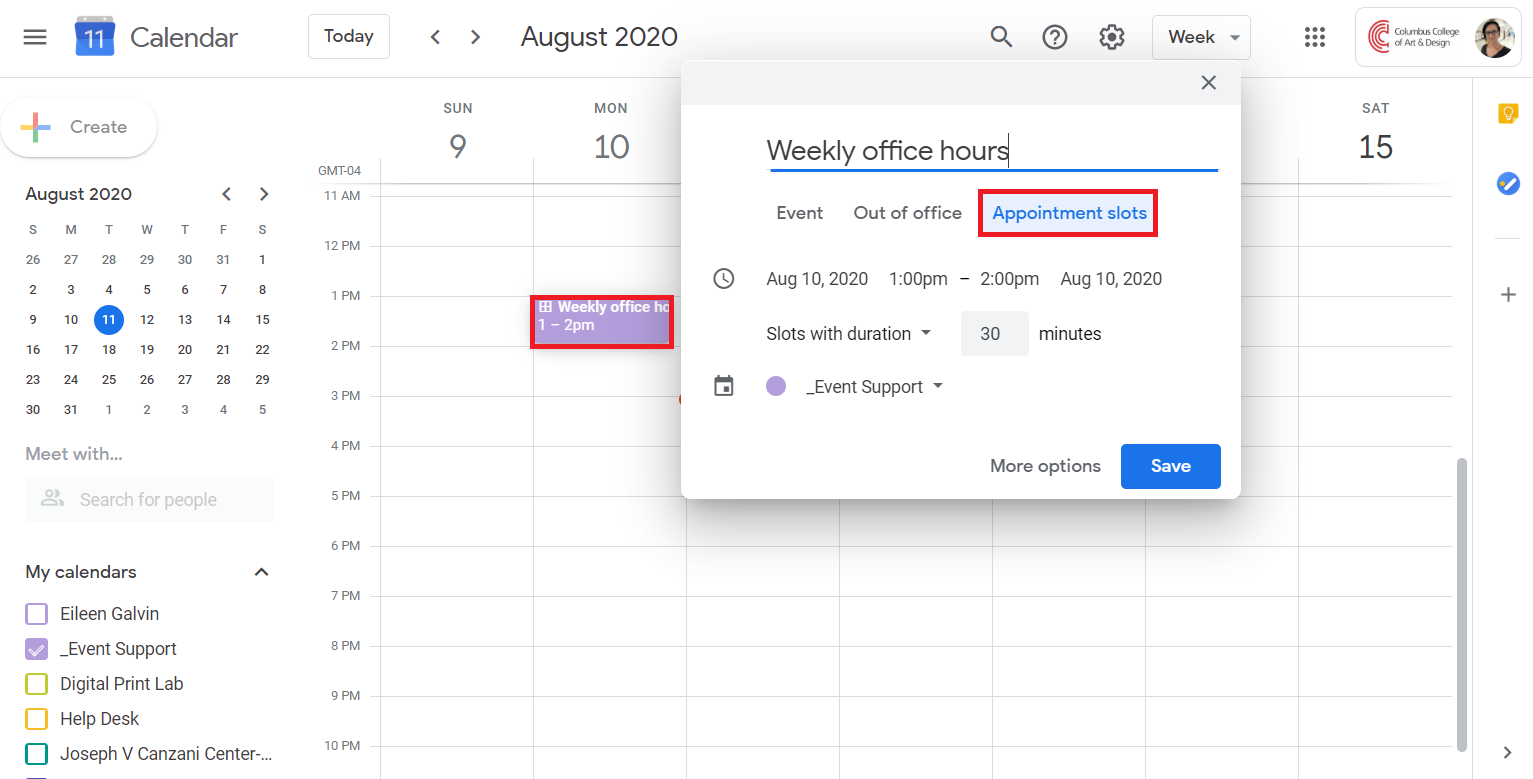
Let’s say for the purpose of demonstration you need to set up weekly office hours from 1-3 P.M. Monday through Wednesday.
First open your Google Calendar by going to calendar.ccad.edu and logging in with your CCAD account.
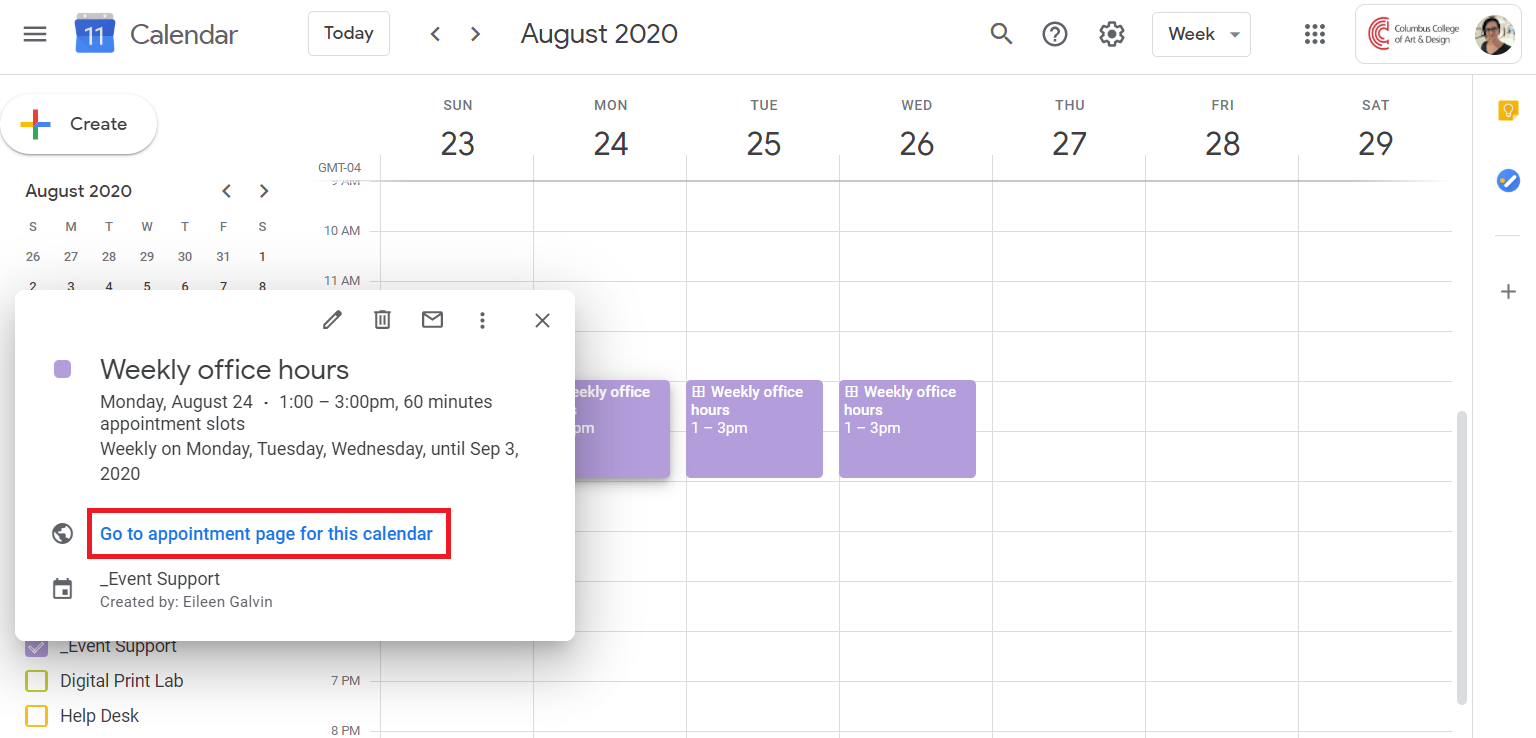
Click an open space to create a new calendar event. Name the event something like “Weekly office hours” and change the type from Event to Appointment Slots.
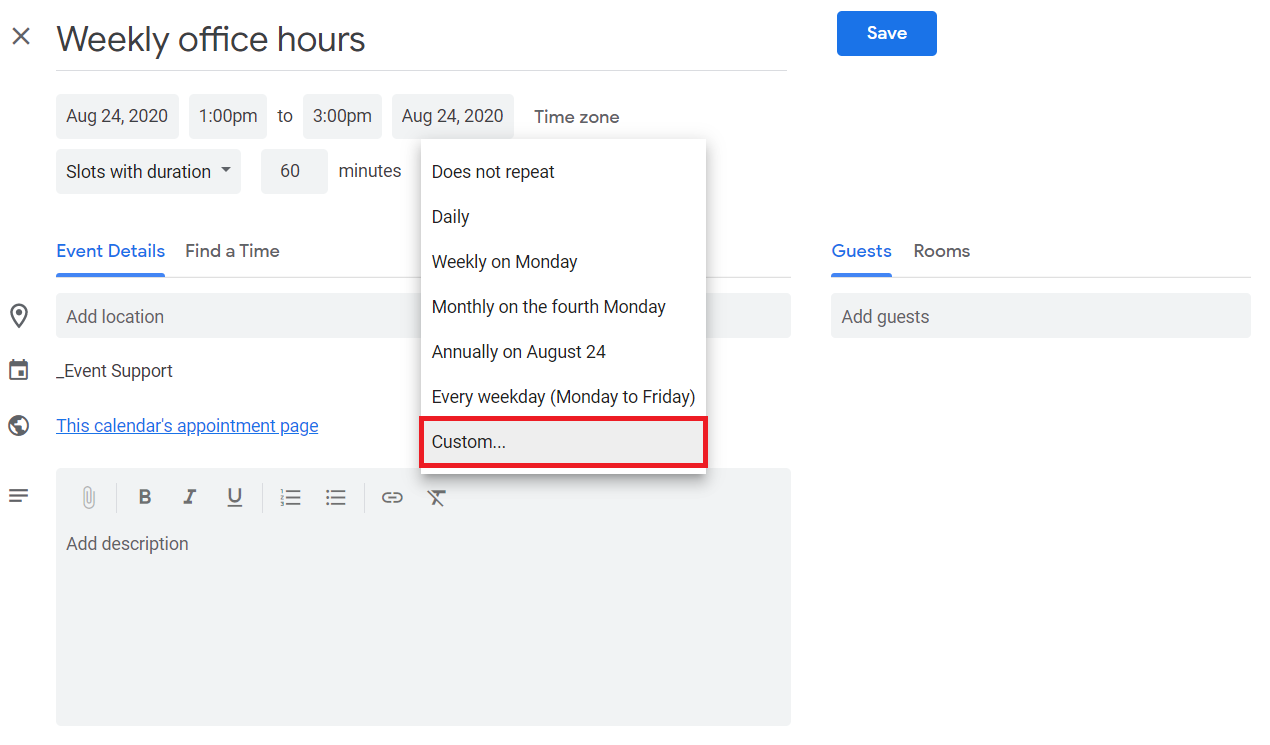
Click More options. On this page, set the end time to 2 P.M. and set the slot duration to 60 minutes.

Click the does not repeat drop down and choose Custom.
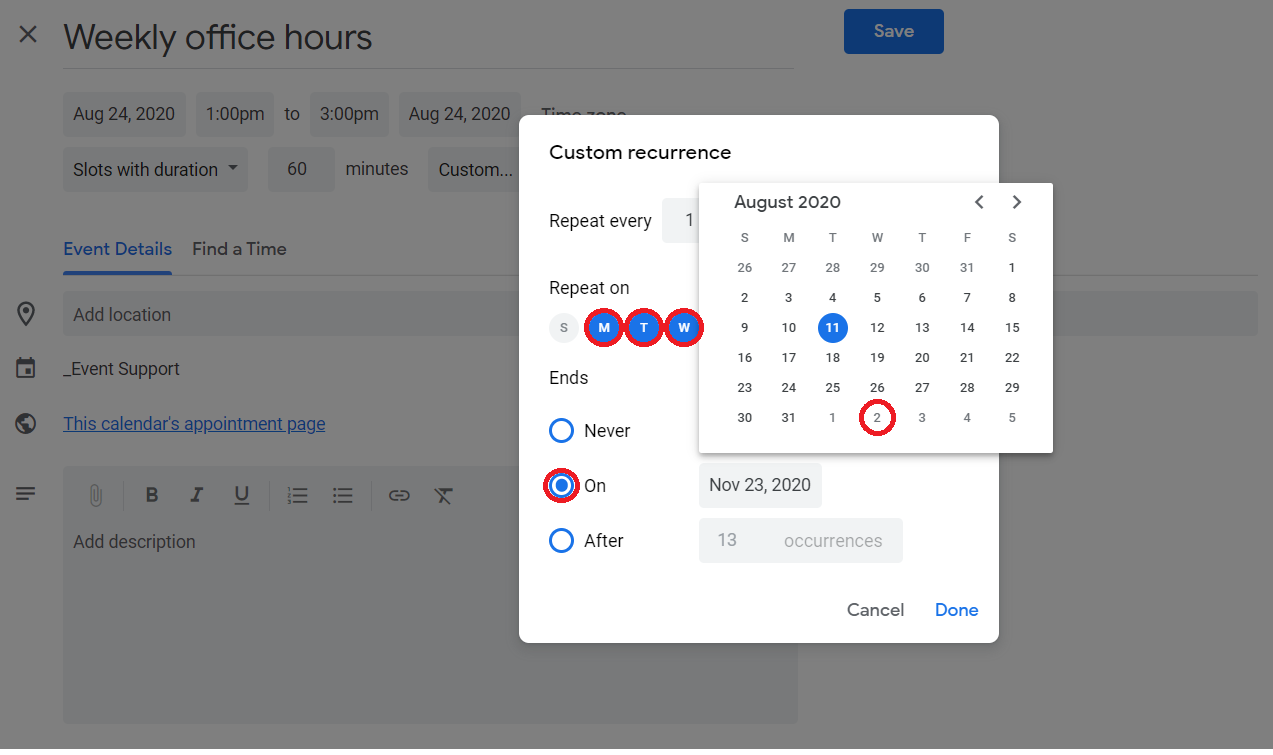
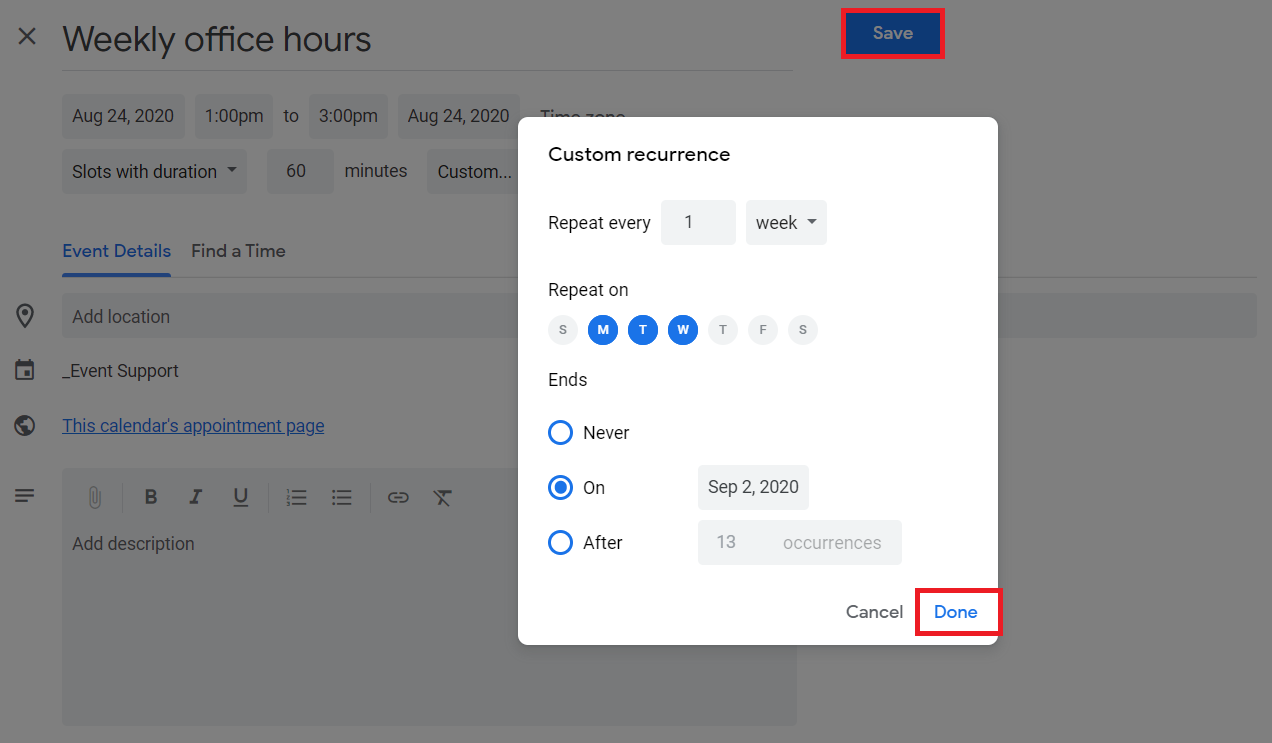
On the pop-up window, click M, T, and W to have to the office hours repeat weekly on Mondays, Tuesdays, and Wednesdays. Under Ends, click the On button to have the appointment slots end on a certain date. For this example, click September 2nd to have the appointments end after two weeks.
Then, click Done and then Save to create your appointment slots.
Click the appointments you just created and then click Go to appointment page for this calendar.
This is what students will see when they go to book an appointment with you.
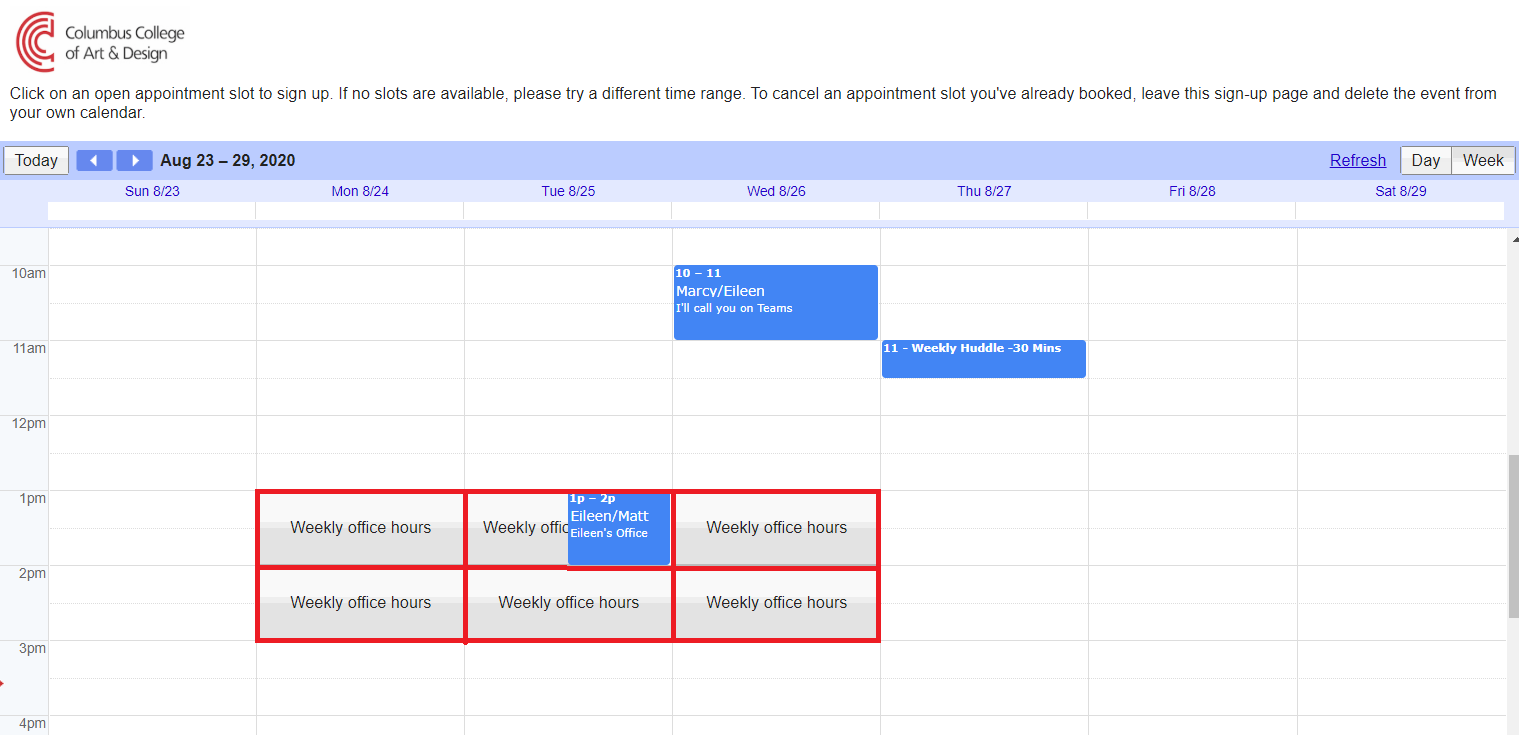
Note that any calendar events that were already on your calendar will also appear, but others will not have access to view the details of your events unless you have given them permission to view full details. (Check out this Google Help page to learn more about sharing your calendar with others.)
From here, you can do one of two things: you can either send the link in a Moodle Quickmail to your students, or you can embed the appointment page directly on your Moodle course. To do the former, keep reading. To do the latter, skip to the next section now.
Copy the URL to your appointment booking page.
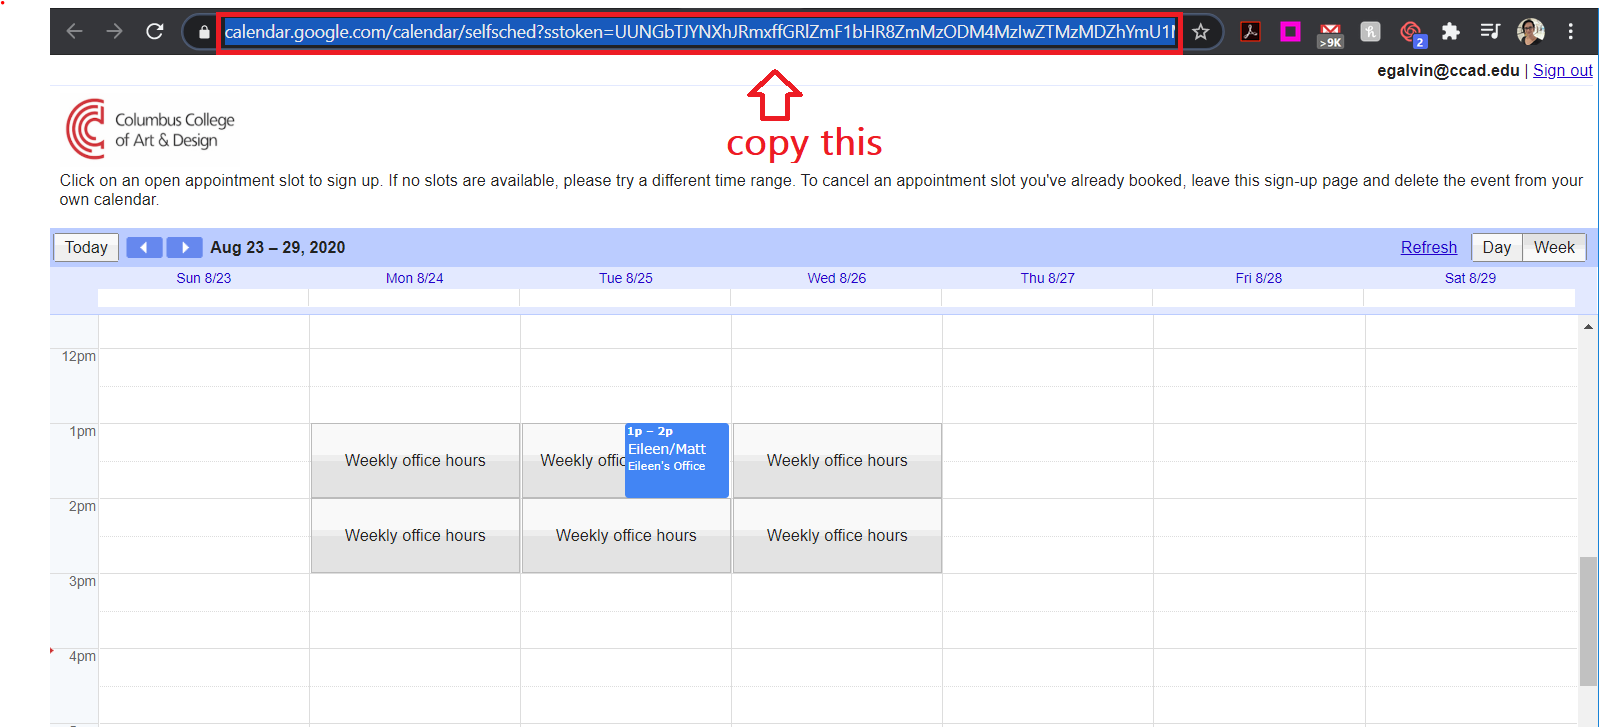
Paste the URL in an email or a Moodle Quickmail to your students.
...
Embed the appointment page on your Moodle course (OPTIONAL)
| Tip |
|---|
Okay, so this part is a little more technical and involves some HTML. But this will make it very easy for students to book office hours with you and will save you time in the long run! |
...
| Info |
|---|
If you like, you can put a label across the top or create a new week and rename it Office Hours to put the calendar in a separate section, as shown below. |
...
After an appointment is booked
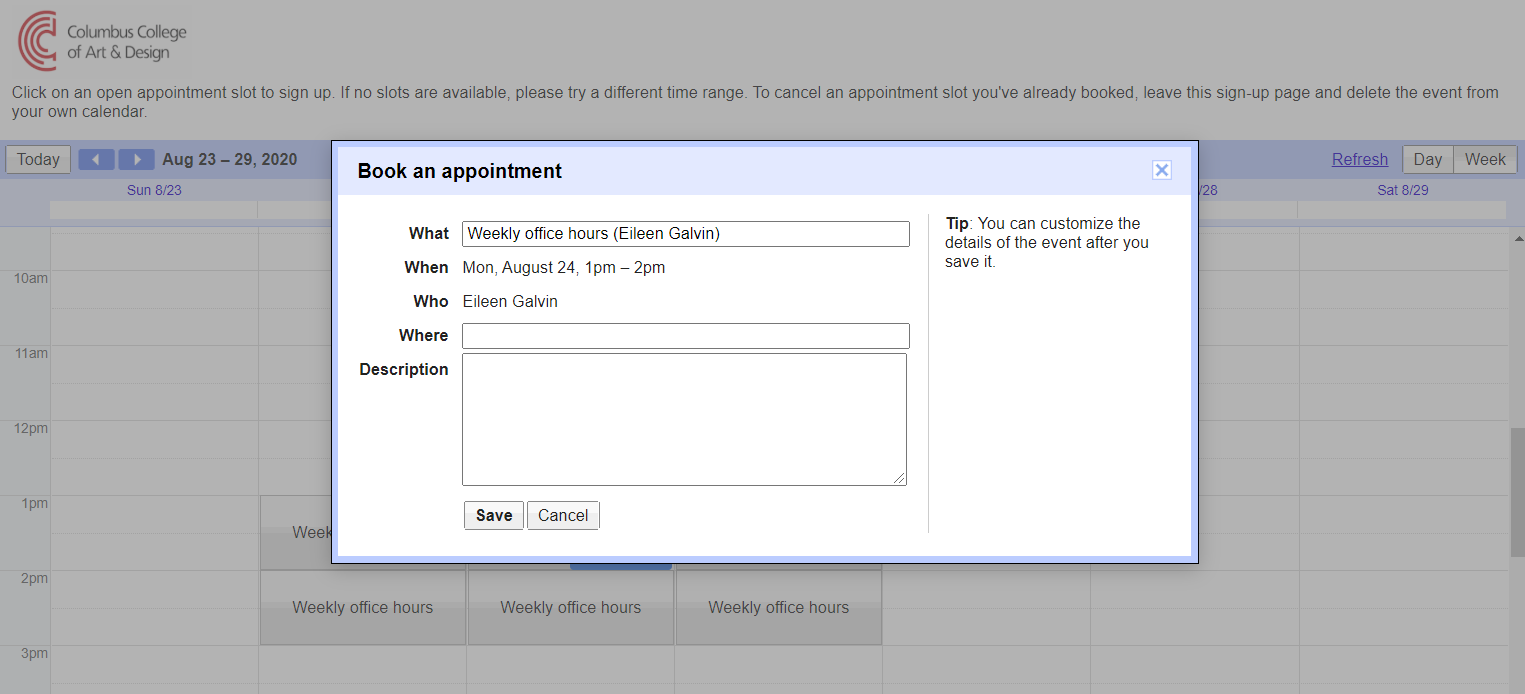
When one of the available slots is clicked, a student will be able to book the time as shown below.
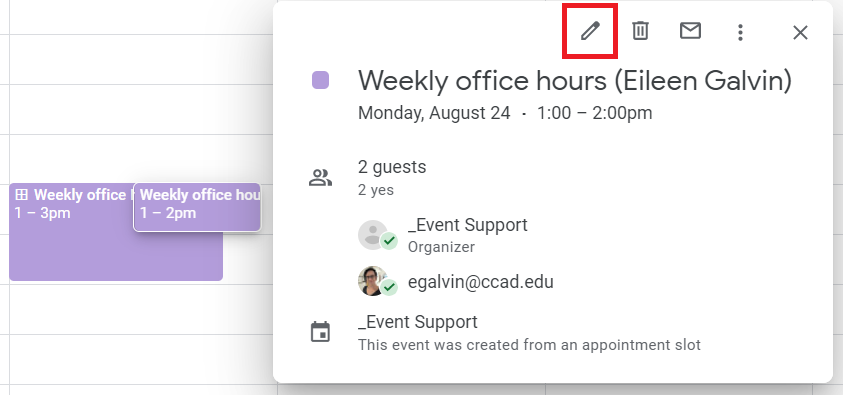
Once booked, the slot will disappear from the booking page and an event will appear on your calendar with you and the student who booked the slot, like the one highlighted below.

To add video conferencing to the appointment, click the event that was booked and click the pencil to edit it.
Then, depending on your video conferencing platform of choice:
Google Meet - Click the Add Google Meet video conferencing button to add a Google Meet meeting room to the event
Microsoft Teams - Type “I’ll call you on Teams” in the Location to let the student know you will call them on Teams at the scheduled time
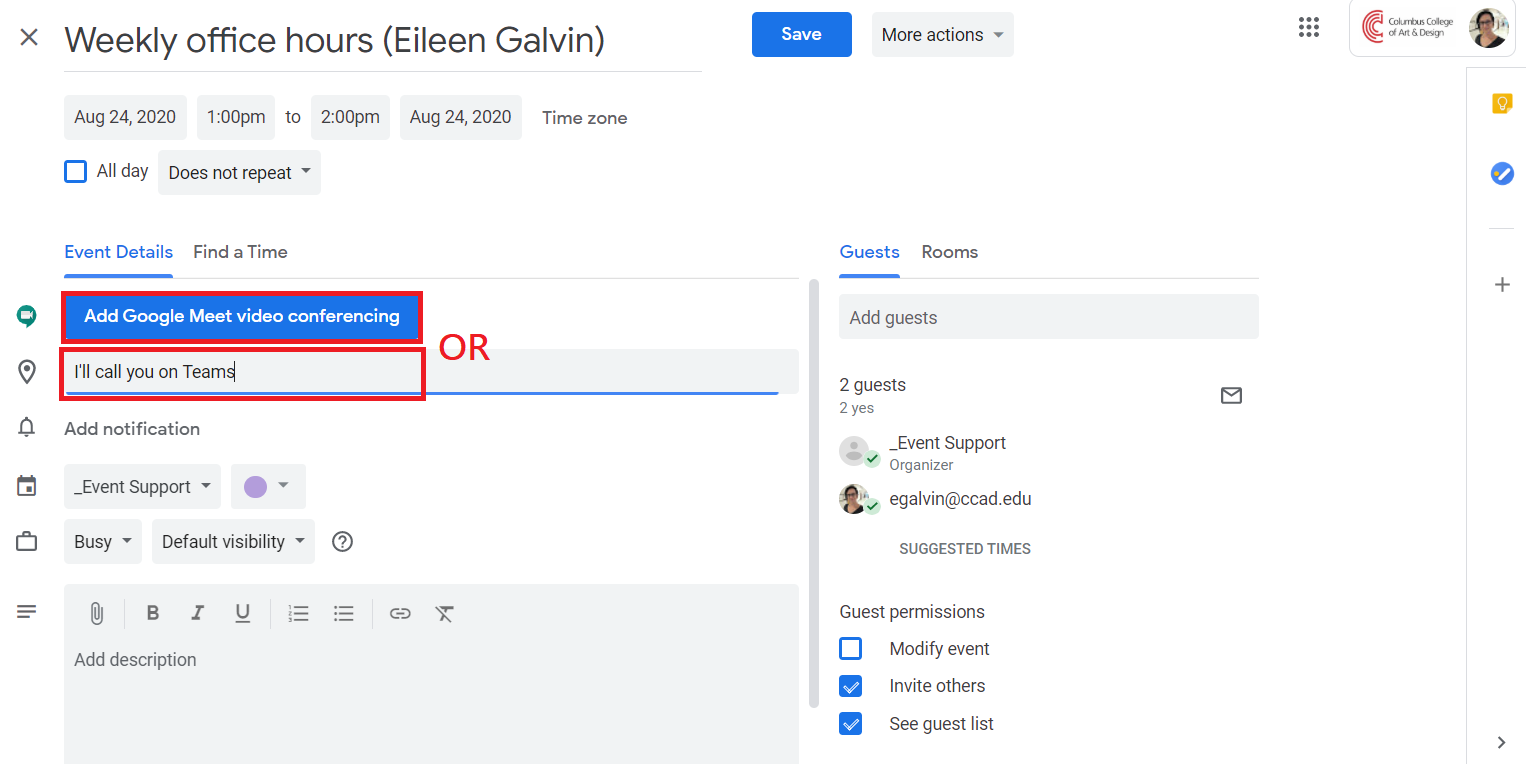
Click Save to save the changes to your event. You’re all set! 🎉
...