How to Print
Transfer your files to the desktop. Do not try to print from the browser window or from your thumb drive.
Right-click your file and select Open With > Adobe Photoshop. The color settings work best with Photoshop.
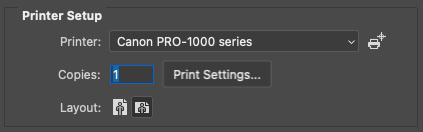
Go to File > Print and check/adjust the following settings:
Make sure the Printer is set to Canon PRO-1000 series.
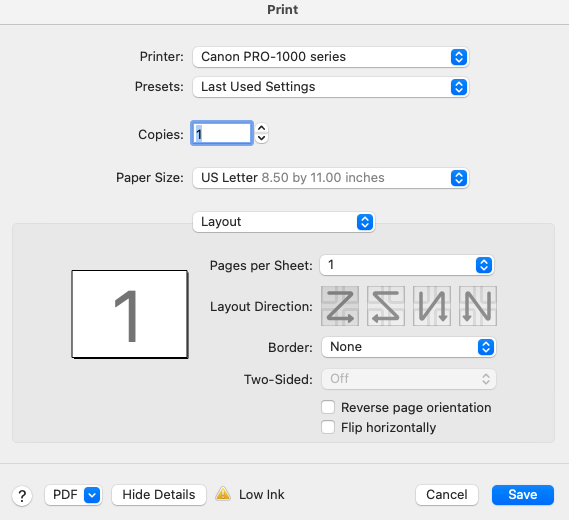
Click Print Settings to check/change the paper size. You will then see the window below:

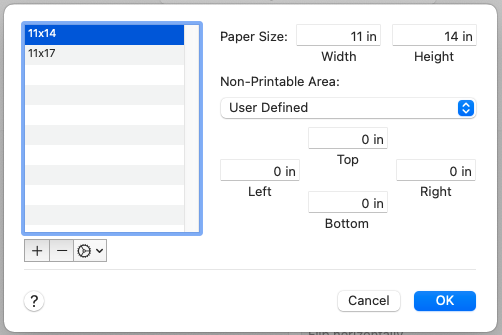
Click the drop-down menu next to Paper Size. If you don’t see your paper size listed, select Manage Custom Sizes at the bottom of the list. That will bring up the window below. Here, click the + sign in the bottom left of the screen to add a new custom size, and type in your width and height. Then click OK.

Click Layout and select Printer Settings.
Paper Source: Manual Feed (top, single feed), or Paper Cassette (bottom, multiple feed)
Media Type: ‘Enhanced Matte Paper’ for Matte, ‘Premium Semimatte Photo Paper (260)' for Semimatte, or ’Premium Luster Photo Paper (260)’ for Luster
Click Save to return to the main print dialogue window.
Scroll down to Color Management. Set the following choices:
Color Handling: Photoshop Manages Colors
Printer Profile: ‘Heavyweight Fine Art Paper’ for Matte, or ‘Photo Paper Pro Luster’ for Luster or Semi-Matte papers.
Rendering Intent: Perceptual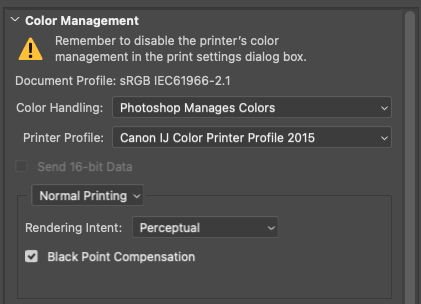
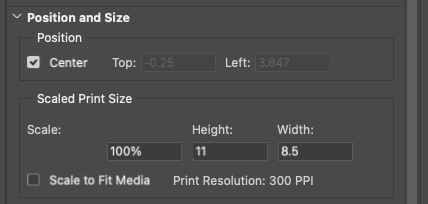
Scroll down to Position and Size. Make sure your image is appropriately scaled. You can see changes live in the box to the left. You can also set the Position to centered, or offset from the top and/or left of the sheet, depending on your print needs.
Click Print.
...